Your first 5 minutes with Claude Code
So, you’ve heard about Claude Code, read our post about why the terminal isn’t as scary as it looks and now you’re ready to try it yourself.
But how do you actually get it running?
In this guide, we’ll show you two different ways: one for people willing to use the terminal (which unlocks Claude Code’s full power) and one using the Claude Desktop app (simpler, but with some limitations).
What you’ll need
Before we start, you’ll need:
- A Claude Pro subscription — Claude Code requires a paid account. If you don’t have one yet, you can sign up at claude.ai.
- A Mac or Windows computer — We’ll cover both operating systems below.
Which installation method is right for you?
There are two ways to get Claude Code running:
Installing via the terminal gives you the full power of Claude Code. You can automate entire workflows, work directly with files on your computer, and build sophisticated multi-step processes. This is what we recommend if you’re willing to get comfortable with the terminal.
Claude Desktop app is a simpler starting point. It’s a familiar chat interface, and you can enable Claude Code features within it. Great for one-off tasks and experimentation, though with some limitations compared to the terminal version.
My recommendation: if you followed along with our intro to the terminal and you’re feeling even a little bit brave, go with the terminal installation. It’s not much harder, and you’ll have access to everything Claude Code can do.
Method 1: Terminal installation
This is the recommended approach — and it’s easier than you might think.
Mac
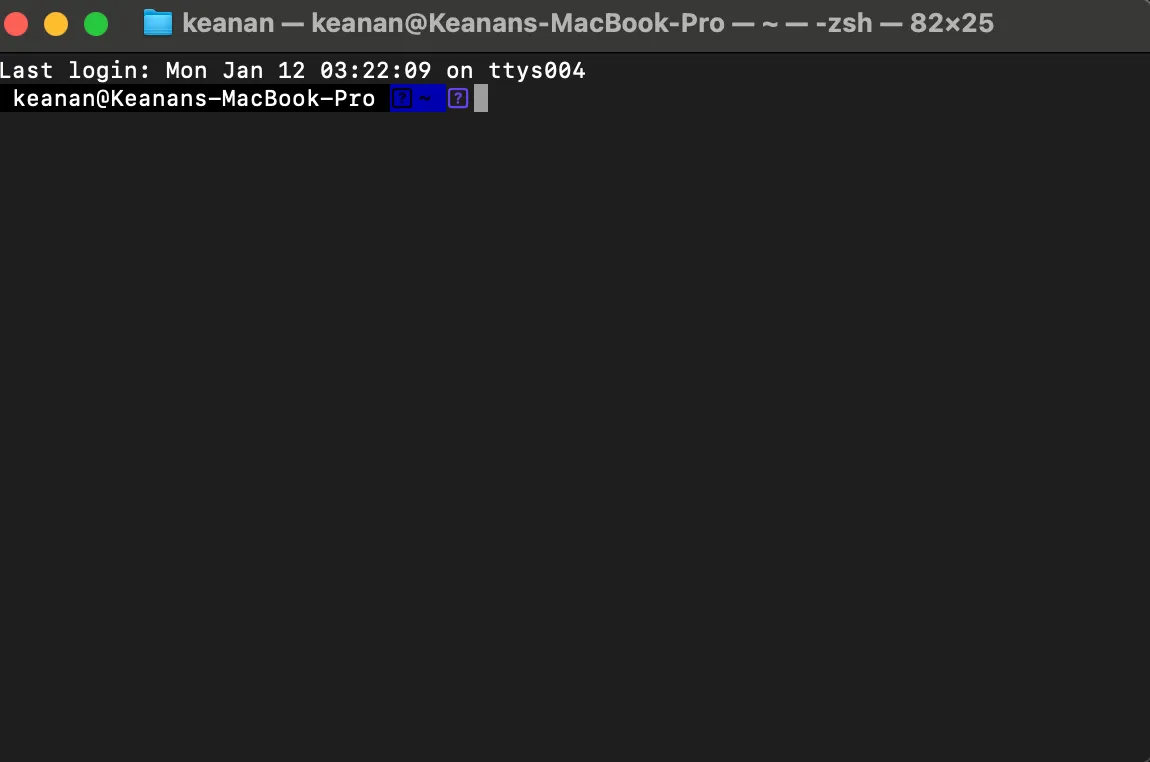
Step 1: Open Terminal
The Terminal app comes pre-installed on every Mac. The easiest way to find it:
- Press
Cmd + Spaceto open Spotlight - Type “Terminal”
- Hit Enter
You’ll see a window with a blank line waiting for your input. That’s it! You’re in the terminal.
Step 2: Install Claude Code
Now for the main event. Copy and paste this command into your terminal:
curl -fsSL https://claude.ai/install.sh | bashHit Enter and wait for it to finish. You’ll see some text scroll by as it downloads and installs — that’s normal.
Step 3: Authenticate with Claude
With Claude Code installed, you need to connect it to your Claude account. Type:
claudeIf you’re not prompted to log in, type /login. Either way, you’ll see a browser window asking you to log in to your Claude account. Sign in, and it will redirect you back to the terminal.
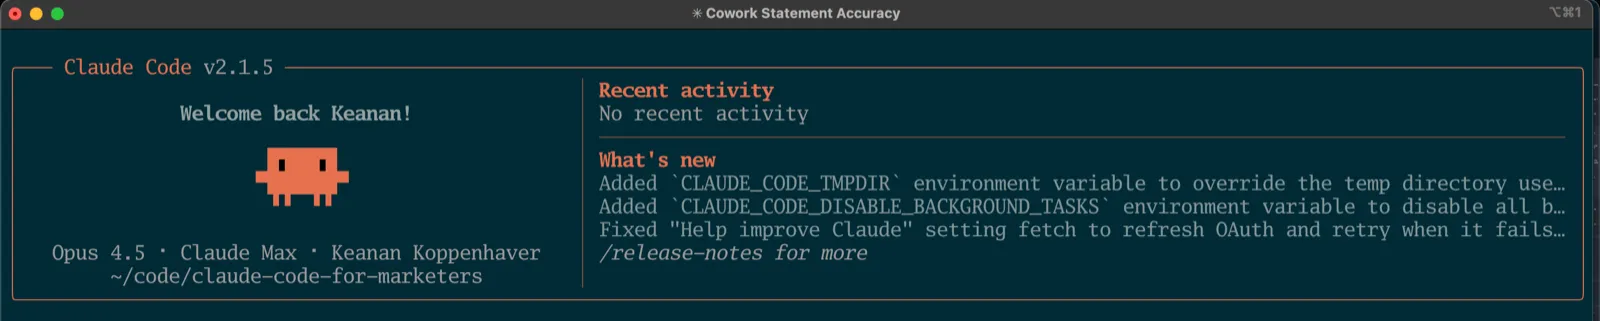
Step 4: Confirm it’s working
After authenticating, you should see Claude Code’s welcome screen in your terminal. Something like:
If you see that, you’re done! Skip ahead to the “Hello world” section below.
Windows
Step 1: Open PowerShell
- Press
Win + X - Click “Windows Terminal” or “PowerShell”
You’ll see a window with a prompt waiting for your input. That’s it — you’re in PowerShell, and you’re ready to install Claude Code.
Step 2: Install Claude Code
Copy and paste this command into PowerShell:
irm https://claude.ai/install.ps1 | iexHit Enter and wait for it to finish. Claude Code now runs natively on Windows — no extra tools required.
Step 3: Authenticate with Claude
Type:
claudeIf you’re not prompted to log in, type /login. Either way, you’ll see a browser window asking you to log in to your Claude account. Sign in, and it will redirect you back to the PowerShell.
Step 4: Confirm it’s working
You should see Claude Code’s welcome screen. If you do, you’re all set!
Method 2: Claude Desktop app
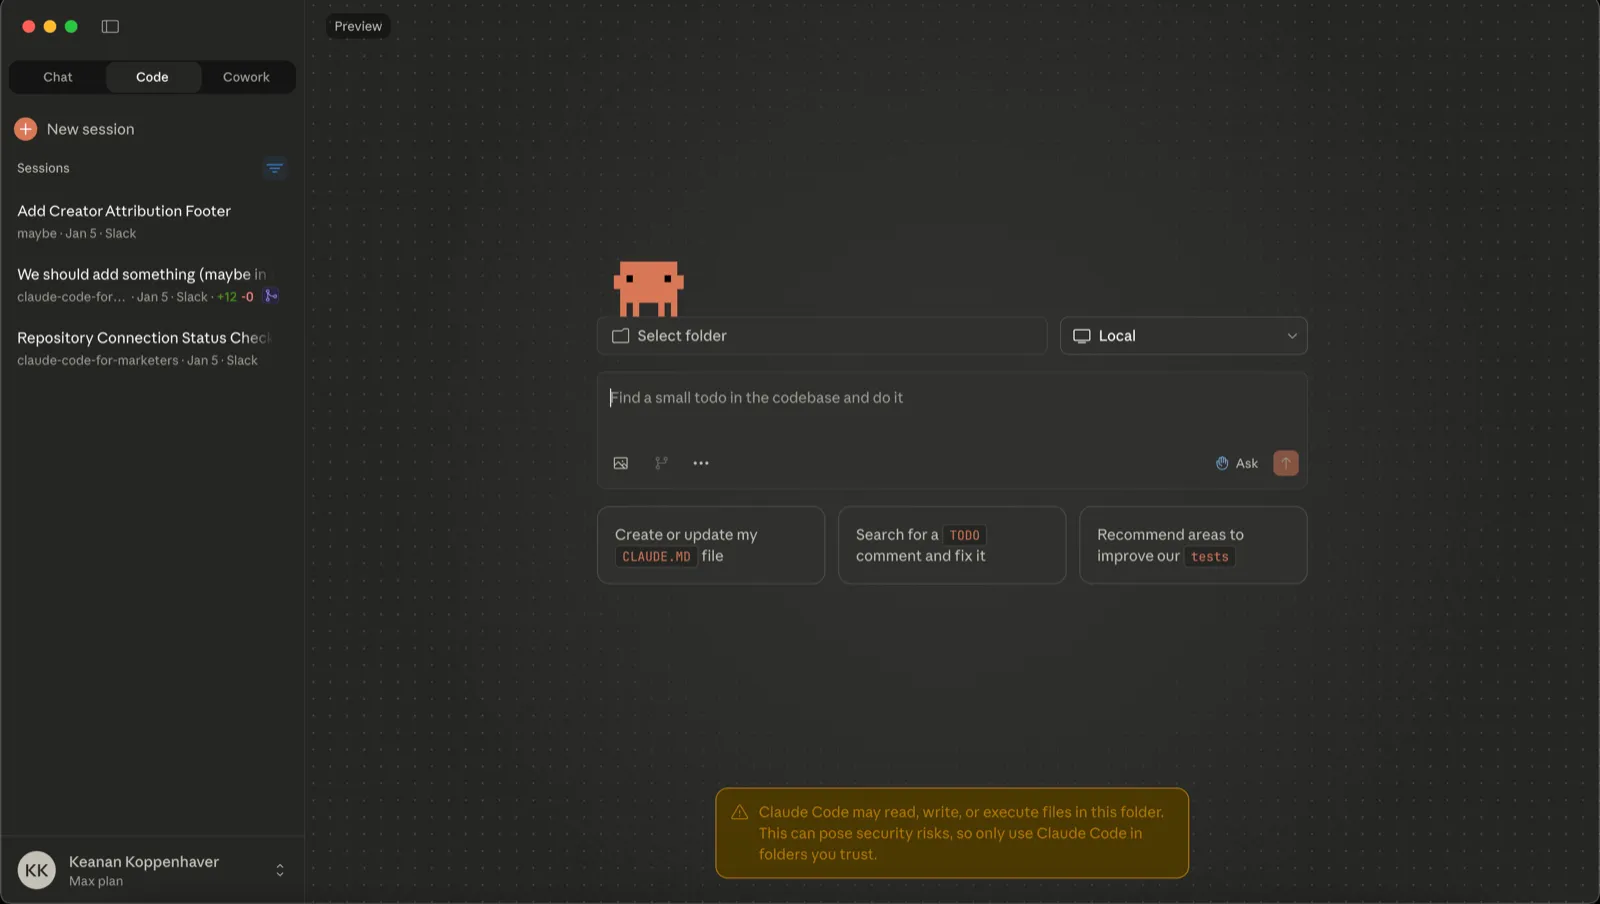
If you prefer a more familiar interface, you can use Claude Code through the Claude Desktop app.
Step 1: Download Claude Desktop
Go to claude.ai/download and download the app for your operating system.
Step 2: Install and open
Run the installer and open the app. Sign in with your Claude account.
Step 3: Enable Claude Code features
Click on the “Code” tab in the upper left. You’ll see a button to install Claude Code — click it and you’re done.
Step 4: Start a session
Create a new session from the Code tab. You’re ready to go.
Hello world: Your first prompt
Let’s make sure everything is working with a simple test.
Whether you’re in the terminal or the Desktop app, try this prompt:
What files are in my current folder?
If you’re using the Desktop app: You’ll need to select a folder first using the folder button in the app. Pick any folder on your computer — your Documents folder works great.
Claude should respond with a list of files. It might ask for permission to access your file system first — that’s normal and expected. Say yes.
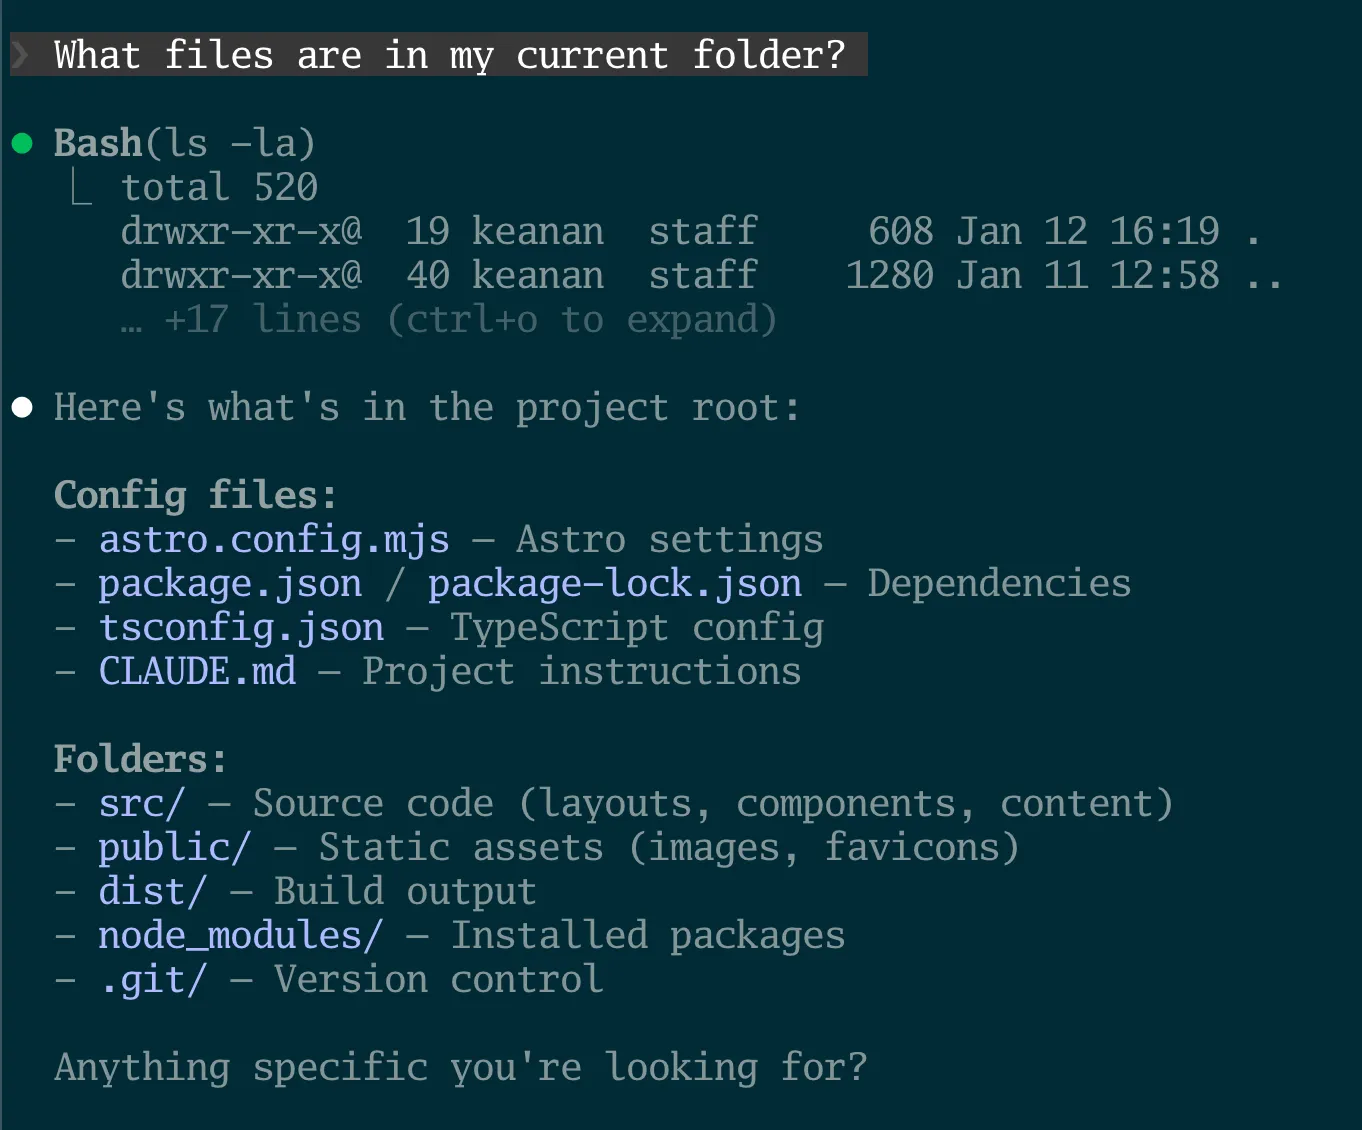
If you see a response listing your files, congratulations — Claude Code is up and running!
What’s next
You just installed one of the most powerful AI tools available. The setup is behind you — now the real fun begins.
In our next post, we’ll put Claude Code to work on a real marketing task: turning a tweet thread into a full blog post. You’ll see exactly how I use it, and you can follow along in just a couple minutes.
If you run into any issues with installation, reply to this email or reach out on Twitter. I’m here to help.
Join our free 7-day email course and learn how to use Claude Code for your marketing work. Then, get notified when we publish new use cases and ways to stay ahead of the curve.
No spam. Unsubscribe anytime.